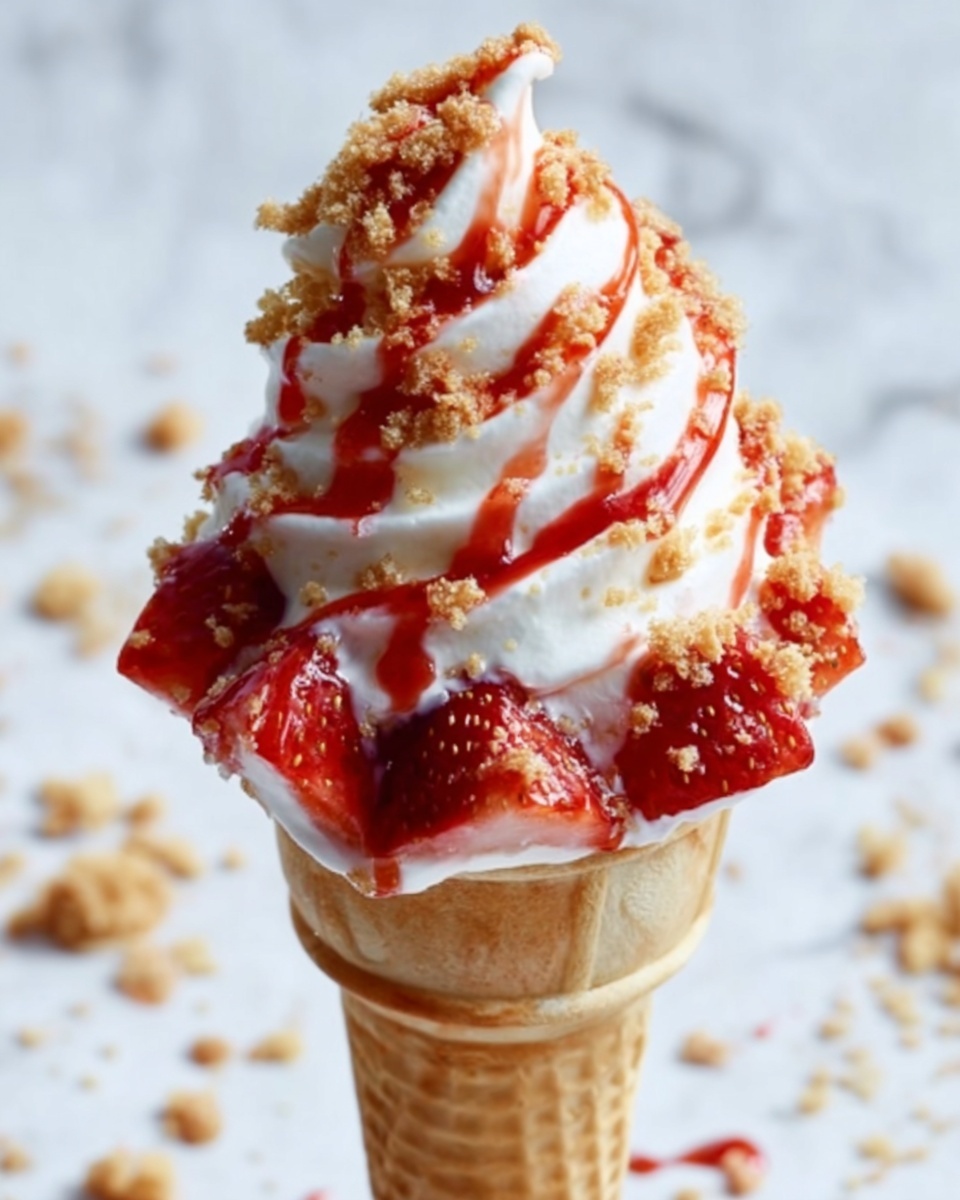
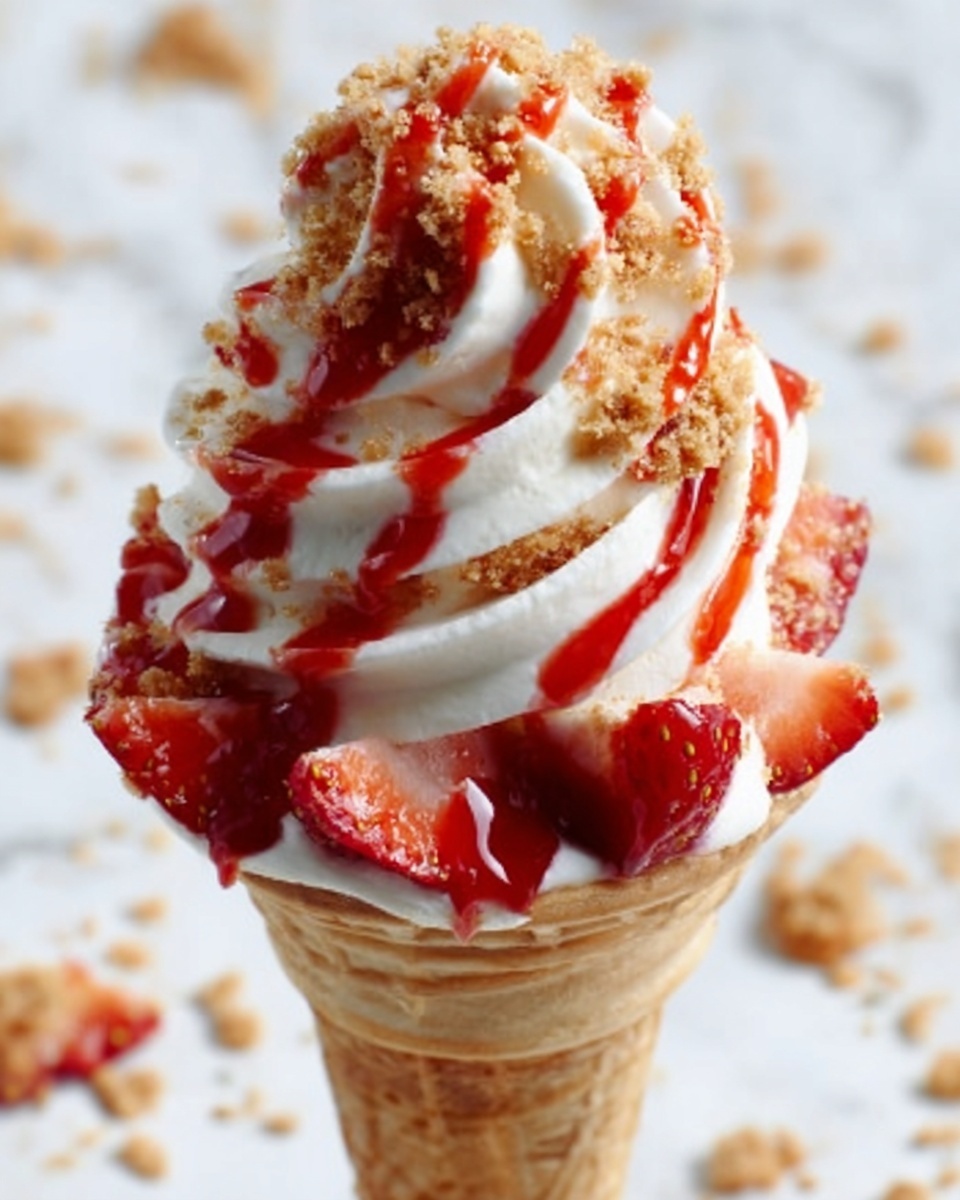
If you are on the hunt for a dessert that perfectly balances that creamy richness with a satisfying crunch and fruity freshness, the Strawberry Crunch Cheesecake Cones Recipe is an absolute must-try. This delightful treat marries the smoothness of no-bake cheesecake filling with the crispiness of waffle cones dipped in luscious white chocolate and coated with a vibrant strawberry crunch topping. It’s an irresistible combination that not only looks stunning but also guarantees a burst of flavor and texture in every bite.
Ingredients You’ll Need
Gathering the right ingredients is the first step to making this recipe shine. Each component plays its part, from the creamy cheesecake filling providing the perfect base, to the crunchy strawberry topping adding color and texture, and the white chocolate that brings a luscious coating for the cones. It’s simplicity with style in every element.
- Waffle or Sugar Cones: Choose sturdy cones to hold all the delicious fillings without sagging.
- White Chocolate (5 oz), melted: Smooth and sweet coating that perfectly adheres the strawberry crunch topping to the cones.
- Strawberry Crunch Topping (1 cup): Adds a vibrant, crispy texture and a burst of strawberry flavor to each bite.
- No Bake Cheesecake Filling (24 oz): Use premade or homemade for a creamy, luscious cheesecake base.
- Strawberries (6-8), diced: Fresh and juicy, they brighten every bite with natural sweetness and color.
- Strawberry Glaze or Sauce, as needed: Adds a sweet, tangy finish that complements the cheesecake beautifully.
How to Make Strawberry Crunch Cheesecake Cones Recipe
Step 1: Melt the White Chocolate
Start by melting your white chocolate according to the package directions. Aim for a smooth and pourable consistency so it will coat the cones evenly without clumping or dripping excessively. This step sets the foundation for the beautiful crunchy coating that will elevate your cones.
Step 2: Coat the Cones
Dip the top part of each waffle or sugar cone into the melted white chocolate. Tap off any excess gently to avoid large globs. This coating will not only add sweetness but also act as the perfect adhesive for your strawberry crunch topping.
Step 3: Add the Strawberry Crunch
Immediately after coating, roll the dipped part of the cone in the strawberry crunch topping. The warmth of the chocolate will help the crunch stick evenly, giving you that irresistible texture and eye-catching color on every cone.
Step 4: Set the Cones
Place the coated cones on a parchment-lined baking sheet and let them rest for 5-10 minutes so that the white chocolate hardens. This step is crucial because it locks in the crunch and prevents any mess when filling later on.
Step 5: Prepare the Filling Bag
Transfer your no-bake cheesecake filling into a piping bag or a Ziploc bag and cut off a small corner for easy and precise filling. This simple trick helps you control every bit of cheesecake that goes into each cone, keeping everything neat and even.
Step 6: Initial Filling
Pipe the cheesecake filling about halfway up inside each cone. Next, add a small spoonful of the strawberry glaze or sauce followed by some diced fresh strawberries. This layer adds burst of juicy flavor right in the middle, creating a delightful surprise with every bite.
Step 7: Final Filling
Continue piping the cheesecake filling until the cone is full to the top. Finish with even more strawberry glaze and diced strawberries. These layers add dimension and make the cones both visually inviting and delicious.
Step 8: Finish & Decorate
Sprinkle additional strawberry crunch topping over the top of each cone, and if you’re feeling extra indulgent, drizzle some more melted white chocolate for extra flair. Then, add a final dusting of the crunch topping to seal the deal on both taste and presentation.
Step 9: Chill & Serve
Place the assembled cones in the refrigerator for 10-20 minutes to chill. This step allows the cheesecake to firm up to the perfect creamy consistency and ensures every bite is a lovely blend of textures. After chilling, your Strawberry Crunch Cheesecake Cones Recipe is ready to impress!
How to Serve Strawberry Crunch Cheesecake Cones Recipe

Garnishes
To make your cheesecake cones extra special when serving, consider garnishing with a fresh mint leaf or a light dusting of powdered sugar. These subtle touches add a fresh aroma and an elegant look without overpowering the core flavors.
Side Dishes
Serve these cones alongside a light fruit salad or a simple glass of sparkling lemonade. The acidity and freshness of these sides perfectly complement the creamy, sweet richness of the Strawberry Crunch Cheesecake Cones Recipe.
Creative Ways to Present
Try standing the filled cones upright in a decorative cone holder or a vase filled with granulated sugar to keep them steady. You can also serve them on colorful dessert plates with extra strawberry sauce drizzled around for a playful, inviting presentation that will wow your guests.
Make Ahead and Storage
Storing Leftovers
If you have leftover cheesecake cones, store them in an airtight container in the refrigerator. This keeps the cheesecake fresh and the crunch topping from getting soggy for up to 2 days.
Freezing
You can freeze the cones by wrapping them individually in plastic wrap and placing them in a freezer bag. When ready to enjoy, thaw in the refrigerator overnight to preserve the creamy texture and best flavor of your Strawberry Crunch Cheesecake Cones Recipe.
Reheating
Since this is a no-bake cheesecake dessert, reheating is not recommended. Instead, allow the cones to come to room temperature for about 10 minutes after refrigeration if you prefer a less chilled bite.
FAQs
Can I make the cheesecake filling from scratch?
Absolutely! While premade cheesecake filling saves time, homemade no-bake cheesecake filling made with cream cheese, sugar, and whipped cream can add a personal touch and fresh flavor to your Strawberry Crunch Cheesecake Cones Recipe.
What can I use if I don’t have strawberry crunch topping?
You can substitute with crushed freeze-dried strawberries mixed with crushed graham crackers or crushed pink candy sprinkles to mimic the color and texture of the strawberry crunch topping.
Can I use other fruits instead of strawberries?
Yes! Blueberries, raspberries, or a mixed berry combination can work beautifully, just try to pair them with a complementary glaze to maintain the dessert’s balance.
How do I prevent the cones from getting soggy?
Dipping the cones in melted white chocolate and letting it set creates a moisture barrier that helps keep the cones crisp longer, which is a key tip when making the Strawberry Crunch Cheesecake Cones Recipe.
Is it okay to prepare these cones in advance?
Yes, you can prepare and assemble them a few hours ahead, but it’s best to add the fresh strawberries right before serving to keep them vibrant and fresh.
Final Thoughts
Making the Strawberry Crunch Cheesecake Cones Recipe is like creating a little piece of joy in cone form. The balance of creamy cheesecake, fresh strawberries, crispy crunch, and sweet white chocolate is truly something to savor and share. I encourage you to gather these simple ingredients and give this recipe a try — it’s a guaranteed crowd-pleaser that brightens any day!
Print
Strawberry Crunch Cheesecake Cones Recipe
- Prep Time: 15 minutes
- Cook Time: 0 minutes
- Total Time: 25 minutes
- Yield: 6 servings
- Category: Dessert
- Method: No-Cook
- Cuisine: American
Description
These Strawberry Crunch Cheesecake Cones are a delightful no-bake dessert perfect for summer or any occasion. Crisp waffle cones are dipped in smooth white chocolate, rolled in a sweet strawberry crunch topping, and filled with creamy no-bake cheesecake filling combined with fresh strawberries and strawberry glaze. Easy to assemble and visually appealing, they make a fun handheld treat with layers of texture and flavor.
Ingredients
Cones and Coating
- 6 Waffle or Sugar Cones
- 5 oz White Chocolate, melted
- 1 cup Strawberry Crunch Topping
Filling
- 24 oz No Bake Cheesecake Filling (premade or homemade)
- 6–8 Strawberries, diced
- Strawberry Glaze or Sauce, as needed
Instructions
- Melt the White Chocolate: Melt the white chocolate according to the package directions until smooth and pourable, suitable for dipping the cones.
- Coat the Cones: Dip the top part of each waffle or sugar cone into the melted white chocolate, ensuring even coverage. Tap off any excess chocolate to avoid dripping.
- Add Strawberry Crunch: Immediately roll the white chocolate-coated portion of each cone in the strawberry crunch topping so it sticks firmly to the melted chocolate.
- Set the Cones: Place the coated cones upright on a parchment-lined baking sheet and allow the chocolate and toppings to harden for 5-10 minutes at room temperature.
- Prepare the Filling Bag: Transfer the no-bake cheesecake filling into a piping bag or a resealable plastic bag with a small corner snipped off to allow controlled filling of the cones.
- Initial Filling: Pipe the cheesecake filling halfway into each cone carefully. Then add a small spoonful of strawberry glaze and a few diced fresh strawberry pieces on top of the filling.
- Final Filling: Continue piping more cheesecake filling to fill each cone completely to the top. Add additional strawberry glaze and more diced strawberries on top for decoration and flavor.
- Finish & Decorate: Sprinkle extra strawberry crunch topping over the filled cones, drizzle some more melted white chocolate if desired, and add a final dusting of the strawberry crunch topping to complete the look.
- Chill & Serve: Refrigerate the assembled cheesecake cones for 10-20 minutes before serving to allow the filling to set and ensure a perfect, cool texture.
Notes
- Use fresh strawberries for the best flavor and texture.
- The no-bake cheesecake filling can be homemade or store-bought premade for convenience.
- Make sure the white chocolate is fully cooled but not hardened before dipping to ensure even coating.
- Store any leftover cones in the refrigerator and consume within 2 days for optimal freshness.
- For a variation, try using other fruit crunch toppings or swapping strawberry glaze for raspberry or cherry.


