
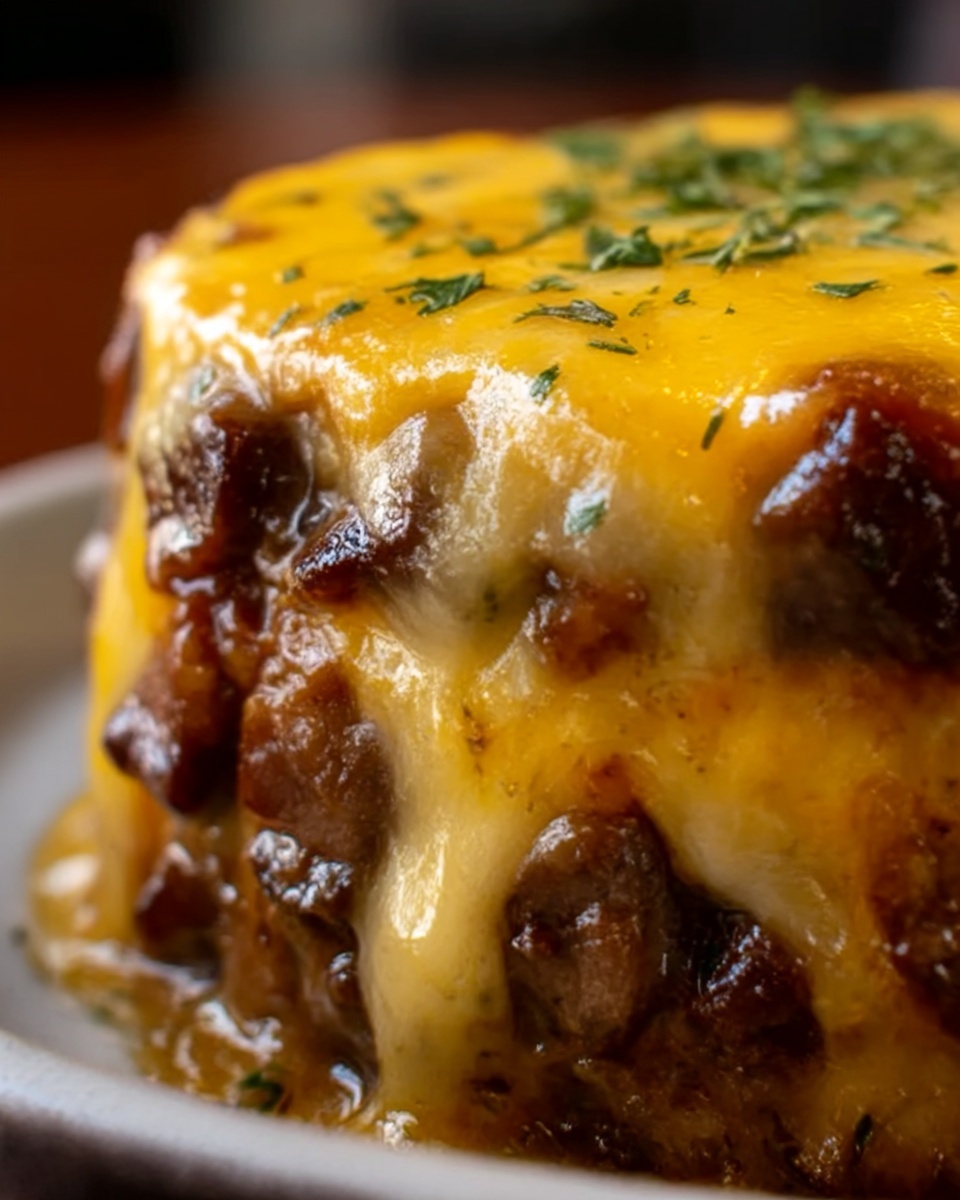
If you’re craving a dish that brings all the nostalgic flavors of a summer cookout into a warm, comforting meal, you have to try the Fully Loaded Classic Chili Cheese Dog Casserole Recipe. This casserole is a delicious medley of juicy hot dogs, rich chili, gooey cheddar cheese, and the perfect crunch from buttery crushed chips on top. It captures the spirit of a chili cheese dog in every bite, making it an absolute crowd-pleaser for family dinners or casual gatherings. Get ready to enjoy a simple recipe that feels like an instant classic!
Ingredients You’ll Need
Ingredients You’ll Need
These ingredients are the heart and soul of this dish. Simple, everyday items but each one plays a vital role in creating layers of flavor and delightful textures—from the savory chili and tender hot dogs to the melty cheese and those irresistible crunchy chips topping it all off.
- 8 hot dogs, sliced into bite-sized pieces: Provides juicy, meaty bites throughout the casserole.
- 1 (15 oz) can chili (with or without beans): Brings a rich, hearty base packed with flavor.
- 2 cups shredded cheddar cheese: Melts perfectly to add creamy, sharp deliciousness.
- 6 hot dog buns, cut into 1-inch pieces: Acts like a soft binder that soaks up all those savory juices.
- 1/2 cup diced onions: Adds a subtle sweetness and a bit of crunch.
- 1/4 cup sliced jalapeños (optional): For a little kick and heat if you love spice.
- 1/2 cup crushed potato chips or corn chips: Gives a buttery, crispy topping that’s the perfect contrast to the melty casserole.
- 2 tbsp butter, melted: Helps the chips crisp up golden in the oven.
- Yellow mustard and ketchup for drizzling (optional): Classic condiments to finish it off with familiar flavor notes.
How to Make Fully Loaded Classic Chili Cheese Dog Casserole Recipe
Step 1: Preheat and Prepare
Start by preheating your oven to 350°F (175°C). Lightly grease a 9×13 inch baking dish to prevent sticking and to ensure easy serving later. This simple prep helps everything bake evenly and keeps the flavors melding beautifully.
Step 2: Combine the Main Ingredients
In a large mixing bowl, toss together the sliced hot dogs, canned chili, half of the shredded cheddar cheese, and diced onions. If you’re using jalapeños, add them here for that subtle heat. Mixing these together lets those flavors marinate and blend before the oven work begins.
Step 3: Add the Buns
Next, fold in the cut-up hot dog buns gently. These little bread chunks soak up all the chili and cheese goodness, creating a delightfully soft and flavorful texture that turns this casserole into a comforting hug on a plate.
Step 4: Spread and Layer
Transfer the mixture into your prepared baking dish, spreading it out evenly so every bite has the perfect balance of ingredients. Sprinkle the remaining cheddar cheese over the top to add a deliciously melty and cheesy crust.
Step 5: Add the Crunchy Topping
In a small bowl, toss the crushed chips with melted butter until they are all coated. Sprinkle this buttery, crunchy topping over the cheese layer. This step is key to adding that signature crunch that elevates the Fully Loaded Classic Chili Cheese Dog Casserole Recipe from good to unforgettable.
Step 6: Bake to Perfection
Place the casserole in the oven and bake uncovered for 25 to 30 minutes. You’ll know it’s ready when the cheese is bubbling and the topping turns a gorgeous golden brown. This baking step melds all the flavors and textures into one irresistible dish.
Step 7: Finish and Serve
Once out of the oven, if you like, drizzle some yellow mustard and ketchup over the top for that final burst of classic chili dog flair. Serve it warm and watch it disappear fast!
How to Serve Fully Loaded Classic Chili Cheese Dog Casserole Recipe
Garnishes
Adding fresh garnishes like chopped green onions, a sprinkle of diced tomatoes, or extra sliced jalapeños can brighten up the casserole. These fresh toppings provide a wonderful contrast to the rich, cheesy base and add a punch of color that makes it even more inviting.
Side Dishes
This casserole is a hearty dish all on its own, but pairing it with a crisp green salad or a simple coleslaw adds a refreshing crunch that balances the richness. If you want to keep the comfort food vibe going, some baked beans or corn on the cob also complement the smoky chili and cheese flavors perfectly.
Creative Ways to Present
Try serving the casserole in individual ramekins for a fun, personal touch at parties or family dinners. You can also layer it in a trifle dish for a dramatic presentation that highlights the layers of buns, chili, cheese, and crunchy topping. This recipe adapts well if you want to make it more festive or casual.
Make Ahead and Storage
Storing Leftovers
Store any leftovers in an airtight container in the refrigerator. The casserole will keep well for 3 to 4 days, and the flavors actually meld better as it rests. Just be sure to cool it completely before refrigerating.
Freezing
If you want to save some for later, this casserole freezes beautifully. Wrap it tightly with foil or use a freezer-safe container. When stored properly, it can stay in the freezer up to 2 months without losing flavor or texture.
Reheating
To reheat, thaw overnight in the fridge if frozen, then warm up in the oven at 350°F (175°C) for about 20 minutes or until heated through and bubbly. You can also microwave individual portions for a quick meal, though the oven keeps the crunch on top intact.
FAQs
Can I use homemade chili instead of canned chili?
Absolutely! Homemade chili works wonderfully and lets you customize the spice level and ingredients. Just be sure it’s thick enough to hold the casserole together without making it too runny.
What type of cheese works best?
Cheddar is classic for this recipe because it melts beautifully and has a sharp flavor that complements the chili. Feel free to mix in a little Monterey Jack or mozzarella if you prefer a milder, creamier cheese blend.
Can I make this casserole vegetarian?
Yes! Swap the hot dogs for plant-based sausages or your favorite vegetarian protein, and use a meatless chili. This way, you still get all the comforting flavors with a veggie twist.
Is there a way to make this less spicy?
Simply omit the jalapeños and choose a mild chili to keep the spice to a minimum. You can also skip the mustard drizzle or use a milder variety to reduce heat while maintaining great flavor.
Can I prepare this dish ahead of time and bake later?
Definitely! You can assemble the casserole a day in advance, keep it covered in the fridge, and bake it fresh when you’re ready. Just add the chips and butter topping right before baking for the best crunch.
Final Thoughts
I can’t recommend the Fully Loaded Classic Chili Cheese Dog Casserole Recipe enough if you want a warm, satisfying meal that captures the best parts of everyone’s favorite chili cheese dog. It’s simple to make, packs incredible flavor, and is perfect for feeding a crowd or treating yourself. Trust me, once you try it, this casserole will be a go-to recipe that everyone asks for again and again!
Print
Fully Loaded Classic Chili Cheese Dog Casserole Recipe
- Prep Time: 15 minutes
- Cook Time: 30 minutes
- Total Time: 45 minutes
- Yield: 6 servings
- Category: Casserole
- Method: Baking
- Cuisine: American
Description
This Fully Loaded Classic Chili Cheese Dog Casserole is a comforting and flavorful baked dish combining sliced hot dogs, chili, cheddar cheese, and crispy baked buns. Topped with buttery crushed chips and optional jalapeños, mustard, and ketchup, it’s perfect for a hearty family meal or casual get-together.
Ingredients
Main Ingredients
- 8 hot dogs, sliced into bite-sized pieces
- 1 (15 oz) can chili (with or without beans)
- 2 cups shredded cheddar cheese
- 6 hot dog buns, cut into 1-inch pieces
- 1/2 cup diced onions
- 1/4 cup sliced jalapeños (optional)
Topping
- 1/2 cup crushed potato chips or corn chips
- 2 tbsp butter, melted
To Serve (Optional)
- Yellow mustard for drizzling
- Ketchup for drizzling
Instructions
- Preheat Oven: Preheat your oven to 350°F (175°C) and grease a 9×13 inch baking dish to prevent sticking.
- Mix Main Ingredients: In a large bowl, combine the sliced hot dogs, canned chili, half of the shredded cheddar cheese, and diced onions. Mix thoroughly to evenly distribute flavors.
- Add Buns: Gently toss in the cut-up hot dog buns with the mixture, ensuring the pieces are coated but not broken down.
- Transfer to Baking Dish: Spread the combined mixture evenly into the prepared baking dish for uniform cooking.
- Add Cheese Topping: Sprinkle the remaining cheddar cheese evenly over the top of the mixture to create a cheesy crust.
- Prepare Chip Topping: In a small bowl, mix the crushed potato or corn chips with melted butter, then sprinkle this buttery chip mixture evenly over the cheese layer for added crunch and flavor.
- Bake: Place the casserole in the oven and bake uncovered for 25-30 minutes, or until the casserole is bubbly and the top is golden brown.
- Serve with Condiments: Remove from the oven and, if desired, drizzle yellow mustard and ketchup over each serving before eating for a classic chili dog flavor.
Notes
- You can use chili with or without beans depending on your preference.
- Optional jalapeños add a spicy kick but can be omitted for a milder dish.
- For added richness, spread a thin layer of mustard inside the hot dog bun pieces before mixing.
- The crushed chips topping provides a delicious crunch; substitute with breadcrumbs if preferred.
- Leftovers can be stored in the refrigerator for up to 3 days and reheated in the oven.

